Guide on Using Artweaver
Artweaver is a free powerful image editing program featuring many of the functions you would
expect to find in high end applications like Photoshop. It is downloadable from:
https://www.artweaver.de/en/download
There is a paid for version (called the Plus Version) but for your requirements the free one is more
than adequate. When it has downloaded, you need to run the installer, again this is a very simple
process, just choose the default options.
Resizing Images
In order for you to display an image on the website you may need to resize it, as it will most likely
exceed the upload limit on the site. To do this you need to:
1. Open the photo you wish to edit. You do
this by choosing File and then Open. This
will open a dialogue box enabling you to
find the photo on your computer.

2. When the photo has been opened you
will need to change it's size. To do this you
need to go to the Document menu and
choose Document Size.

3. When the Document Size box opens you
are presented with a few options. There
are three things we need to check here.
First is the actual size of the file. You
change this to a size more in keeping with
your needs. If you require the end result to
be a different shape to your original then
you will need to make the smallest
measurement (Width or Height) the size
you need and then crop the image later
(See Below).
Second is Constrain Proportions. This must
always be set as turning it off will result in
a distorted image. You will notice that the
height will automatically adjust when you
change the width.
Finally is the Resolution, you need to set
this to 72 pixels/inch for display on the
website.
You don't need to worry about the other
things in this box as they are not relevant
to you.

4. When you have the image the correct
size, you then want to save it. Click on File
then choose Save As (this will allow you to
choose a different name and preserve the
original image). When you have decided on
a name and location for your file, click on
the Save button and you will get the JPEG
Options box.
Here there are two things of note; The
Slider Bar (1) and the Quality readout (2).
The Quality readout will change as you
move the slider left or right. You want this
readout to be 5KB under your upload limit
(100KB for V4 & 5 sites, 250KB for V6).
When you are happy with the size, click on
OK and your file will be saved.
You should now be able to upload the file.

Cropping an Image
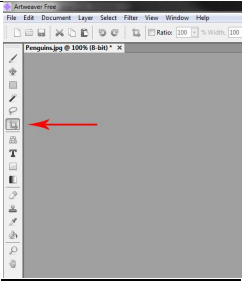
1. To Crop an image you need to have the image
open and choose the Crop Tool from the side
toolbar

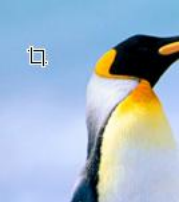
2. Move your cursor onto the image and you
should see it looking like the one in the picture.

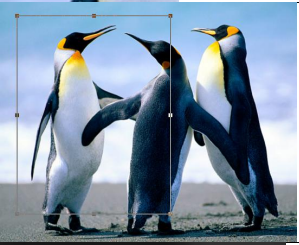
3. Click on the image and drag your cursor down
and to the right, then let go. You will now see
the Crop box on your image. You don't have to
be too accurate when creating the box as you
can adjust it's size using the black squares in the
corners and on the edges.

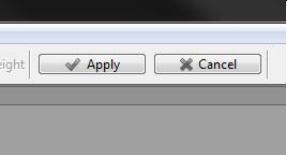
4. Once you are happy with the size of the crop
box, click on the Apply button on the top tool
bar and save your image.

